Re-installing a multi-partitioned RedHat 7.1 for
The Rembo Wizard
Problem description
An existing RedHat 7.1 workstation should be converted to be used with the
The Rembo Wizard. The problem is
with the current partitioning scheme of the system with two partitions for
the system, one partition for the user data and one swap partition while
The Rembo Wizard manages only
one system partition.
Task description
We will use both the Rembo Toolkit in the command line mode and
The Rembo Wizard to reinstall
the system with the partitioning scheme supported by
The Rembo Wizard. The two system
partitions will be combined together to one system image and stored on a
Rembo Server. The user data directory will be temporarily stored on the
Rembo Server as well. Then the hard disk will be partitioned with three
partitions: system, swap data. Stored images are installed on new
partitions. /etc/fstab will be modified before the system is started
again. After verification, a new base image is taken with
The Rembo Wizard.
Analyze the partition table of the actual installation
It is best done when the old system is still running. In the example
system, we have following type of partition distribution with df(1):
Filesystem           1k-blocks      Used Available Use% Mounted on
/dev/hda1              1011928     63880    896644   7% /
/dev/hda3              5044188      5600   4782352   1% /home
/dev/hda2              3028108    204828   2669460   8% /usr
/dev/hda4 is the swap partition as can be seen in the system's
/etc/fstab(5). From above follows that the "/" and the "/usr"
partitions should be combined on the new /dev/hda1, while the new
swap should be on /dev/hda2 and the user's data should be restored
on a new /dev/hda3.
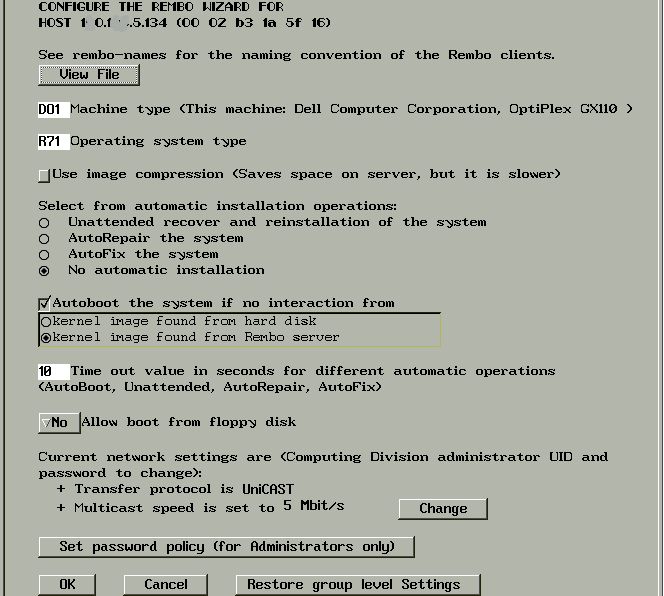
Prepare the target system to boot with
The Rembo Wizard and create
temporary images.
 This
work includes the selection of meaningful System Type and OS Type names
for the installation and setting a meaningful configuration
The Rembo Wizard for this host.
In this example, the System Type is "DO1" and the OS Type is "R71" for
RedHat Linux 7.1. It is to be noted also that the system is located in a
classical style, 10 Mbit/s Ethernet segment with a fan-out unit. Therefore
the network protocol is Unicast and we use the transfer speed setting of
max. 5 Mbit/s. Working with Unicast means also that will not use any local
disk cache but we will operate on the Rembo Server's file system directly
(we will use net:// instead of
cache:// URI's when referencing
to archives). This
work includes the selection of meaningful System Type and OS Type names
for the installation and setting a meaningful configuration
The Rembo Wizard for this host.
In this example, the System Type is "DO1" and the OS Type is "R71" for
RedHat Linux 7.1. It is to be noted also that the system is located in a
classical style, 10 Mbit/s Ethernet segment with a fan-out unit. Therefore
the network protocol is Unicast and we use the transfer speed setting of
max. 5 Mbit/s. Working with Unicast means also that will not use any local
disk cache but we will operate on the Rembo Server's file system directly
(we will use net:// instead of
cache:// URI's when referencing
to archives).
Take images of the original system
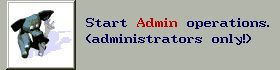
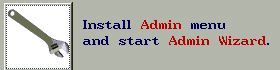
Sorry, some typing is required. There is no automation possible here but
you have to give some Rembo commands by hand through the Rembo's
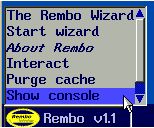
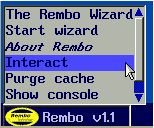
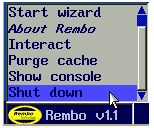
interactive interface. Load and start Rembo's administration plug-in
through the following buttons in
The Rembo Wizard.
From the menu in the lower left corner, open up a console to see the
result of (and the errors in) your commands. Open also the interactive,
command typing dialog with the help button.

Let's start with the /home directory, the data directory which
should be kept separated. We will build a base image of the corresponding
disk partition, /dev/hda3 with the following command.

BuildDiskImage(0,3,"net://host/hdimages/homebup.bas");
That is "take a simple, non-virtual image of the third partition (3) of
the first disk (0) and store it on the network file system (Rembo Server), in
host level scope, in the directory
hdimages, filename homebup.bas".
Observe the console for any errors; you should see a Synchronization bar to
appear almost instantly.
What follows is a little more complicated. We must now combine all the system
partitions in one, single image. This is done with the help Rembo virtual
images. For more explanations, see
Creating a Linux Base Image section in the Rembo Client Administration
Manual.
Create a virtual image starting with /dev/hda1 partition.
CreateVirtualImage("system","disk://0:1");
Add the /usr partition /dev/hda2 on the virtual image system,
just created
LinkTree("link://system/usr","disk://0:2");
Create now a combined base image of the two partitions with filename that
corresponds
The Rembo Wizard file naming
convention (DO1R71.bas).
Synchronize("link://system","net://host/hdimages/DO1R71.bas","");
 When
the operation is finished we will observe that we have the two base images
created on the remote server. This can be done in three different ways: When
the operation is finished we will observe that we have the two base images
created on the remote server. This can be done in three different ways:
- With a Windows workstation based Rembo Server Management Console (as
illustrated on the left), located in the "wintools" directory of the
Rembo Toolkit's distribution..
- With the shell prompt command line command "netclnt", located in
the "misc" directory of the Rembo Toolkit's distribution.
- From the client screen's file browser as explained below.

Repartition the hard disk
WARNING: From this point on, there is no return! As
an experienced system administrator you certainly do understand the
potential risks of the following procedure which erases all the
information from the disk.
 It
is good idea now to It
is good idea now to
 .
Since we are going to change the partition table of the system it is
better to make sure that there is no open file handles hanging around in
the Rembo OS. .
Since we are going to change the partition table of the system it is
better to make sure that there is no open file handles hanging around in
the Rembo OS.
Otherwise an error message like
 would
appear somewhere on the line. would
appear somewhere on the line.
From the original installation we would create the new partition
distribution that would adapt both to the original configuration and to
the partitioning rules of the
The Rembo Wizard for Linux
systems.
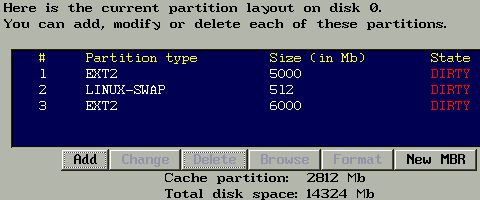
- /dev/hda1 (1) for the system (5 GB)
- /dev/hda2 (2) for the swap (512 MB)
- /dev/hda3 (3) for the data (6 GB)
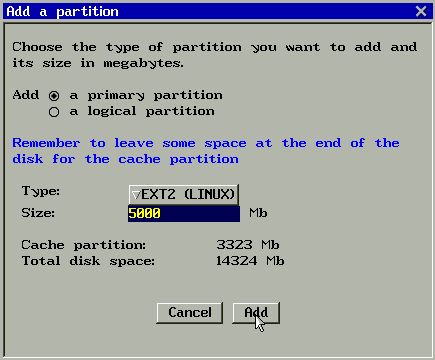
We could do the partitioning with some Rembo Toolkit's commands, but since
we are lazy typers we are happy to use Rembo Toolkit's own partition
manager.
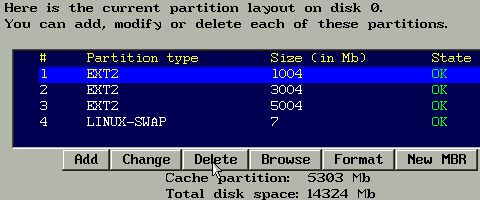
Select partitions with a click of the mouse, one at a time, from partition
4 to 1. Use the Delete button on all partitions to remove them from
the disk's partition table. Use the Add button to create a new
partition table. Note that all partitions will be primary partitions on
the first partition table of the disk. Do not use logical partitions.
Below is the resulting partition table.
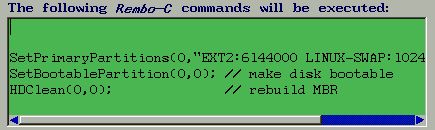
Press now the Commit button on the Rembo Toolkit's partition
manager to write the partition table on the disk. It will show us what
commands you could have given yourself in the Interact-window. It is
noteworthy to observe that also the master boot record will be cleaned in
the process. Press Do It !
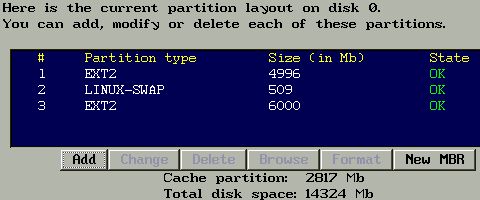
Click on Done to leave the Rembo Toolkit's partition manager. You
can then revisit the partition manager in order to see what are the
actual sizes of each partition; depending of the disk geometry and
cluster size, it is rather rare to see that you can get exactly the values
in MB that you have requested.
Restore the original content
Restoring is better done with the Rembo Toolkit's command line.
Restore the base image on the /dev/hda1 partition (this will format
the partition as well).
RestoreDiskImage(0,1,"net://host/hdimages/DO1R71.bas");
Format the /dev/hda2 (swap) partition.
HDClean (0,2);
Restore the user's data on the /dev/hda3 partition (this will
format the partition as well).
RestoreDiskImage(0,3,"net://host/hdimages/homebup.bas");
Modify the /etc/fstab according to the new partition scheme, using
the Rembo Toolkit's file manager and its text editor.
FileMan("disk://0:1");
- Files are not listed alphabetically but in the order of their creation...
- Most of the Linux installations are using the LABEL=xxx presentation of
the disk partition in /etc/fstab. Replace the presentation with the basic
device presententation, ex. /dev/hda1

Above is the new /etc/fstab file of the modified system in the Rembo
Toolkit's File Manager's editor window.
Test the restored system
Boot the system with the original kernel, in this system
vmlinuz-2.4.3-12.
LXBoot("disk://0:1/boot/vmlinuz-2.4.3-12","","root=/dev/hda1");
Everything should be as before...
Take new base image with
The Rembo Wizard
Beside the /etc/fstab, there is probably some other modifications that you
have carried out in the restored system. Anyway, it is good idea now to
- Register the new partition table signature into the autoload-file
- Take a base image of the restored and modified system.
In the example the end-user is supposed to take his/her own differential
system backups. Therefore the base image is taken in the host scope.
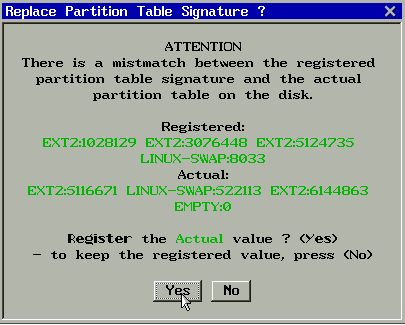
Say Yes to the above question and in the following configuration
dialog, do not forget to press OK to store the new partition table
signature into the autoload-file of the host.
Now take a system administration level backup - the base image - using the
The Rembo Wizard's main menu
functionality.

Use now the Admin Backup button to make a new base image. It will
replace the original one, taken from the system with multiple partitions.
Remove the temporary backup of the user's data partition
 The Rembo Wizard
is not intended to be used for data backups. In the above partition
scheme, only the /dev/hda1 will be backed up. There is no need to leave
the temporary data partition archive on the Rembo Server. Delete
homebup.bas. The Rembo Wizard
is not intended to be used for data backups. In the above partition
scheme, only the /dev/hda1 will be backed up. There is no need to leave
the temporary data partition archive on the Rembo Server. Delete
homebup.bas.
08 Mar 2002
|